Friday, November 24, 2023

Building a three cord firewood rack

Back in 2016, I finally decided to build us a firewood rack that would hold the three cords of wood we go through each heating season. Previously, it was the tarp method, which really was a PIA.
The dimensions to hold the three cords are 48" wide, 16' long, and 6' tall at the top plate. Here it is under construction:
I used kind of a quasi-timber frame construction:
The entire rack, save for the roof system, was built out of pressure treated lumber. The floor system is 2x6 lumber with joists 2' on center (no pic, but the actual floor is 5/4x6 decking):
I made my own roof trusses with a 6/12 pitch and a good overhang. As luck would have it, 4'x8' 7/16" OSB sheets fit perfectly, two to a side. Wish I could say I designed that purposefully, but, LOL, I can't. It just happened.
I added 5/4" x 6" decking lumber to the ends of the rack, and today, seven years later, it is still going strong:
WAY better than tarps!! Cheers, Gary

Thursday, November 23, 2023

Three framings from 2023

For some reason, it feels like I created more than three framings in the Winter/early Spring of 2023, but I didn't, according to my photo log. Maybe that last rod rack and building our camp have colored my creative memory, LOL. At any rate, here are the three framings...a commission and two donations. An incredible fly tyer from Pennsylvania commissioned me to create a framing that would be a present to his dad. He sent me a set of his salmon/steelhead flies, and an original Denton steelhead litho to build the framing around. It was a good project, and I was gratified to hear that the father was thrilled with his son's gift. The framing (don't forget you can click on the pic for a larger version):
The flies:
I asked one of North America's best streamer tyers, Larry Leight of North Carolina, if he would tie and donate several Cains River streamers for a project I had in mind. He didn't hesitate, and promptly sent me three gorgeous Cains streamers. I wanted to frame them with a map that showed the Cains river and a section of the Main Southwest Miramichi River, but couldn't really find one. So I stitched together pieces of the old Manzer maps as well as using google earth downloads and came up with my own hand-drawn map of the rivers. A fun project; felt like I was back in 5th grade doing geography projects (LOL, which was 63 years ago!). The map (which I printed on 140# textured water color paper):
The flies (you can see the nice texture of the water color paper in this view):
The final framing. Never did a triple mat framing before, but the colors of the flies almost demanded it.
Even splined the cherry frame on this one. Donated to the Miramichi Salmon Association's online auction, I was a bit disappointed that it only sold for $250. Oh well.
Finally, probably my favorite of the framings I have done to date: A Thomas Aquinas Daly watercolor with a fly tied by Tom. He is an old friend of mine, whom I hadn't spoken to in years, but I wanted to create something really special for the MSA-US Spring fundraising event, so I sent him an email, and he came through with flying colors. I've always loved and admired his work (I have several of his etchings and an original watercolor wash he did for me of a ruffed grouse still life) and thought this would be a really special addition to the fundraiser. The watercolor wash:
The fly (a Picasse, originated by guide Marc LeBlanc of Quebec):
The final framing (I used the platform method of matting the watercolor; there is no adhesive anywhere near the actual art).
I'm very pleased to report that the framing went to a very good home not twenty miles from our home here in Vermont; it sold for $2,000, which made all concerned very happy. Oh, Tom sent me a second watercolor, which will be available at the MSA-US fundraiser Feb. 3,2024 in Portland, ME. It will be framed with flies by the likes of Preston Jennings, Charles DeFeo and others. The watercolor:
Stay warm, and Cheers! Gary

Monday, November 20, 2023

The Last Rod Rack

I can't even remember when I designed and built my first rod rack (for myself), but it is still with me, and is made out of leftover lengths of longleaf heart pine we used for flooring in the house we built in South Carolina, so it was quite some years ago. Since that first rack, I've made quite a few for folks, most of whom came to me via the the Classic Fly Rod forum. All have been built out of white pine; I like working with it, and, finished correctly, it is beautiful and can stand the test of time. All of the gentlemen I have worked with on these have been delightful customers; probably the best part of building the things. Each had a different set/number of rods to be accomodated in a rack, so we worked together to get a design that was functional and pleasing to the eye. I believe we have a one hundred percent success rate along those lines. Having said all that, this post is about the last rack I'll build for anyone other than myself (cherry for our Miramichi river camp sometime in the future). A rack takes a week of my life from start to finish...and while I hope I have more than a few weeks left on this earth, I've decided I just don't want to spend any of those weeks building rod racks. And if I charged what I really think my time is worth, no one in their right mind would buy one from me...and I've built racks for some very generous guys. The fellow I built this last rack paid me more than I asked him for, and even padded his payment for freight pretty significantly which was much appreciated. Anyway, on to the rack. The customer stated from the outset that he wanted it made out of redwood...and that he would supply the wood. Shortly after we agreed we'd build the rack, this eight foot package arrived at our door (click on the pic for a larger version)
It contained incredibly straight, clear redwood:
We worked together on a design for the tube holes that had a good look and could handle the rods he had. This photo shows what we settled on; you can see that I moved the centerline of the smaller holes to center them on the top and bottom plates of the rack. I tape the template to the top and bottom and use an awl to transfer the center of each hole to the wood.
Here is the glued-up top with its hole locations (that clear redwood is some beautiful, but it SO soft. If you even look at it wrong, it dents. Don't ask me how I know.)
The fun begins: drilling out all those holes:
There is a price to be paid for all that drilling if you use forstner bits (I don't anymore):
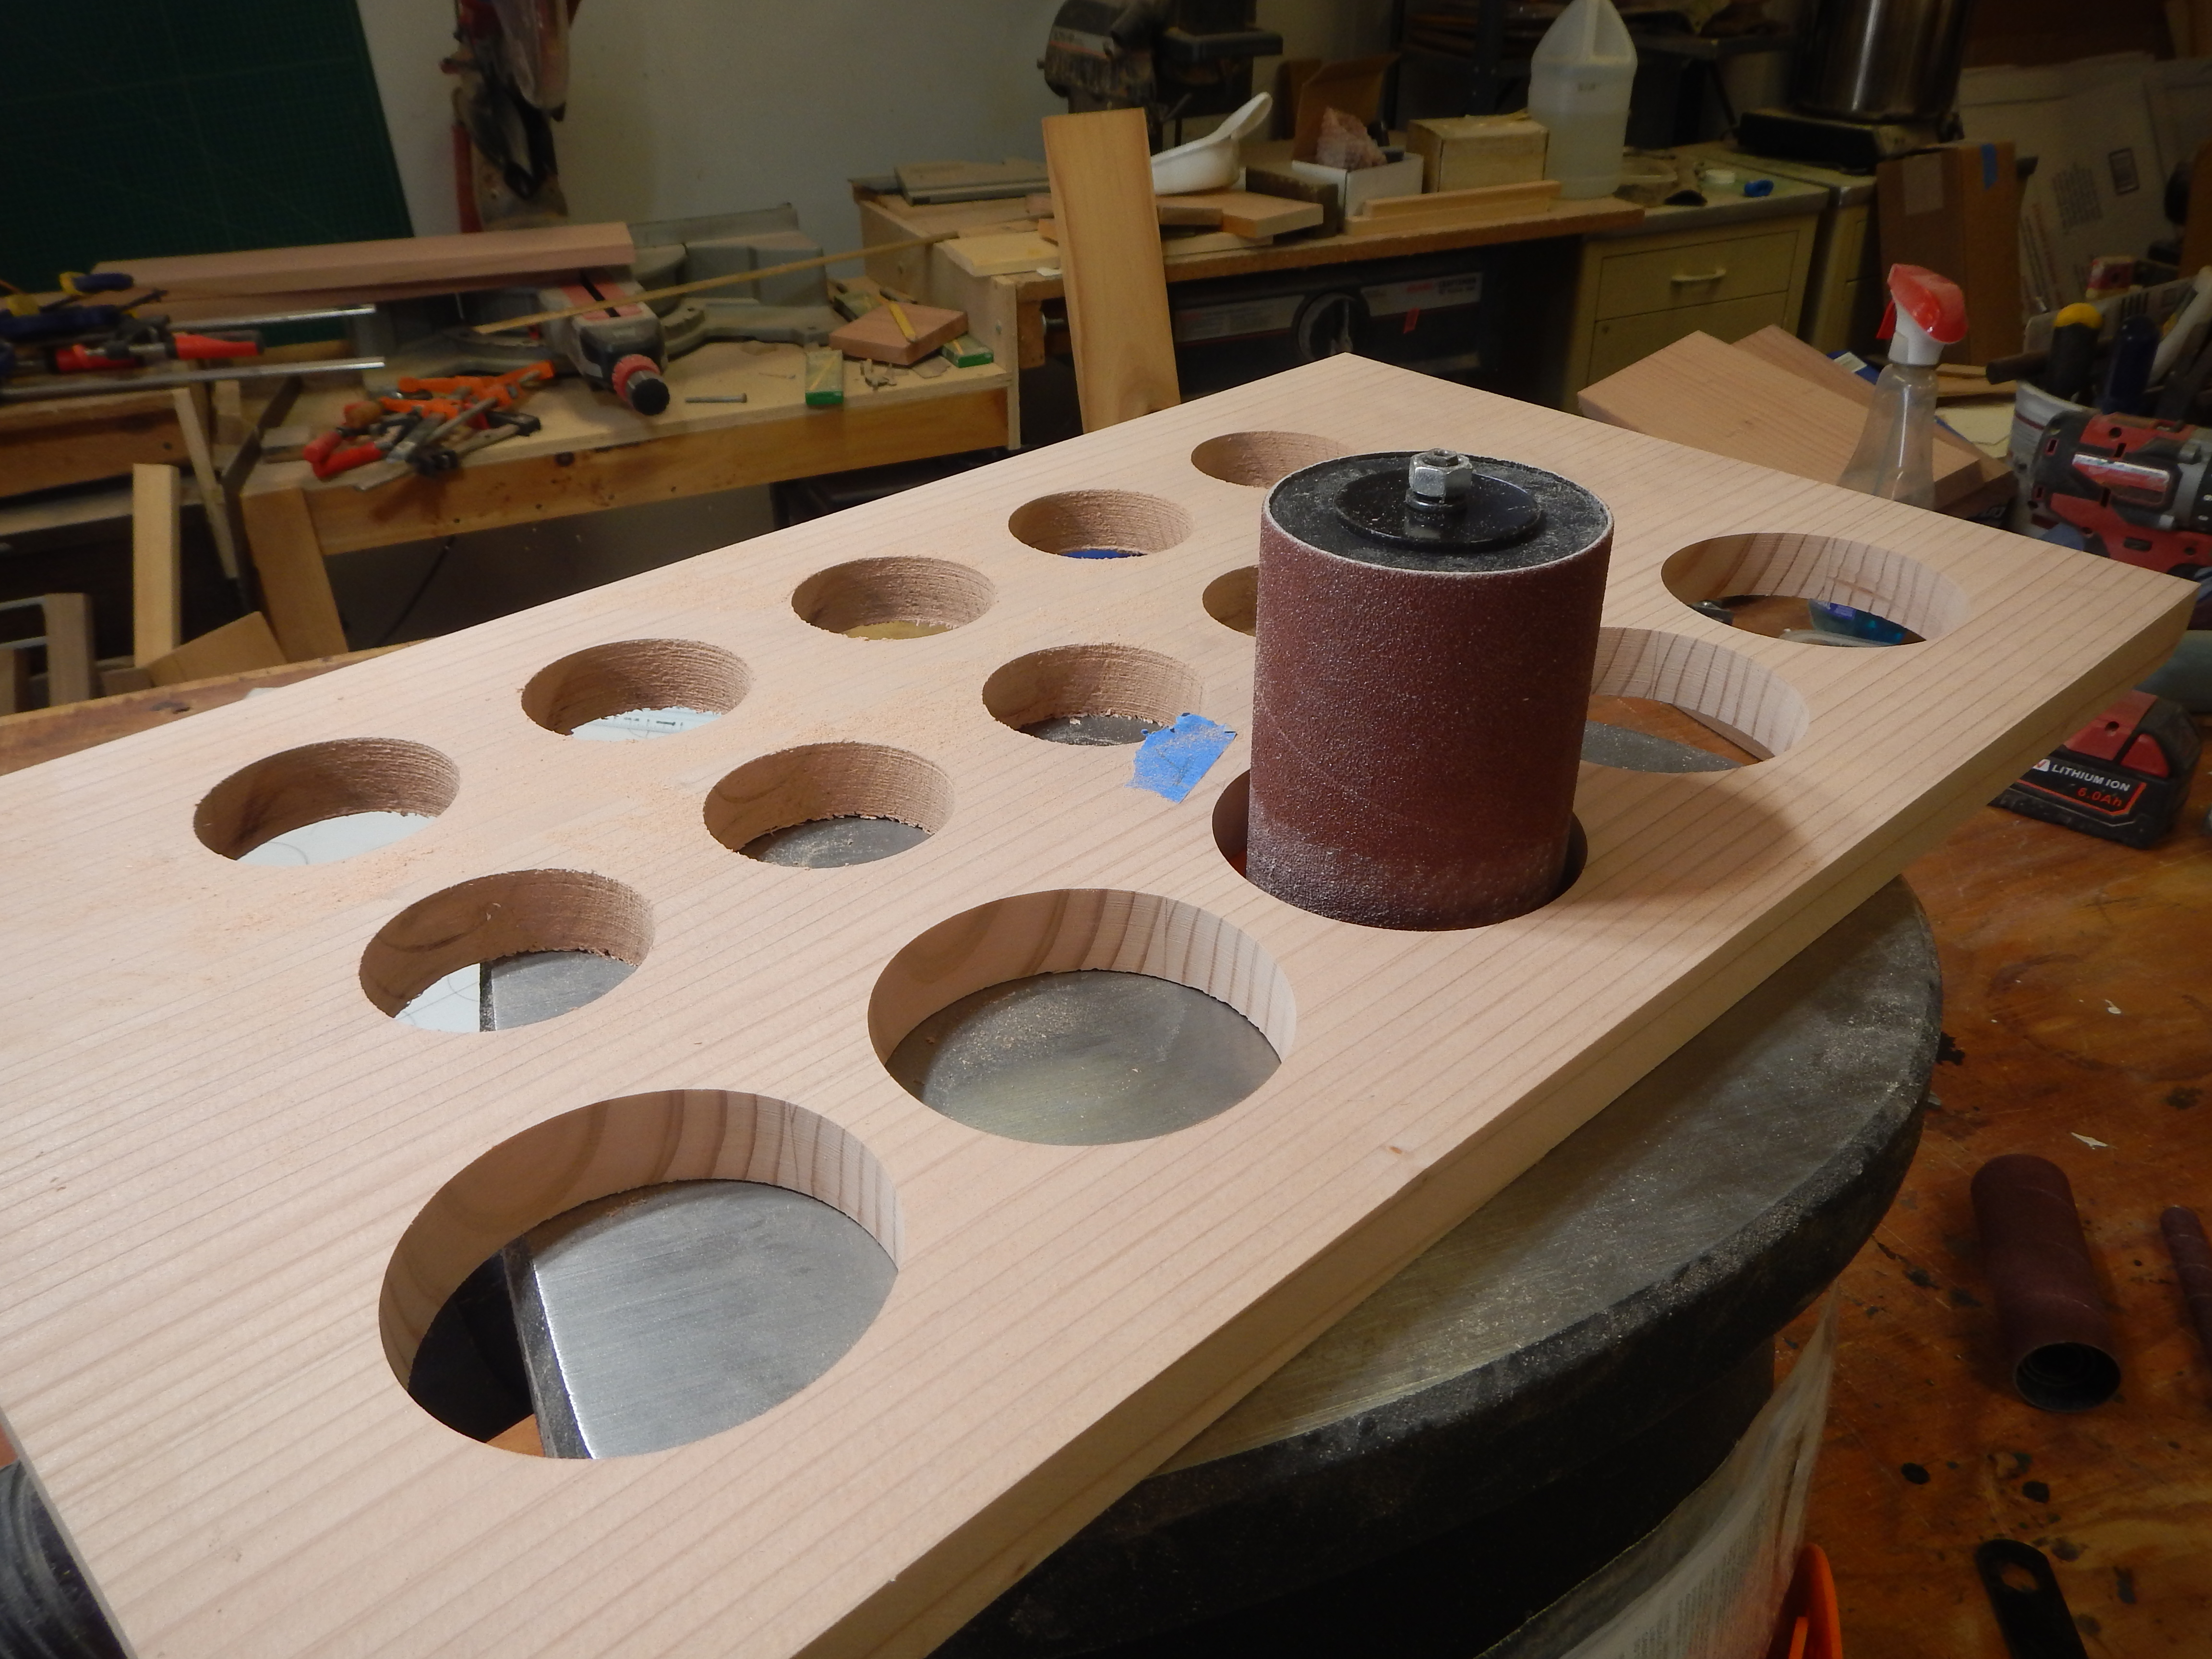
Sanding the inside of those holes used to be quite a chore. I bought an oscillating spindle sander that really eased that burden; I'm sure I'll find other uses for it sometime.
A router with a little 3/16" roundover bit makes for a nice, neat presentation.
The uprights for this rack presented a problem. With white pine racks, I was always able to match an edge to a face of the thing to make it look like one piece, like this and glue up pretty easily:
The redwood didn't cooperate; it was pretty much flat sawn, so an edge of a board looked way different than the face of the board.
So the easy upright devolved into cutting the pieces with a forty five degree edge so that when glued up, both faces looked the same. Glue-up wasn't simple, either.
The entire rod rack process is pretty clamp-intensive. Here the base is being glued up:
Finally, all the pieces of the puzzle assembled and awaiting final assembly and sanding:
I was in a bit of a hurry to get up to the Miramichi to get started on our camp, so didn't take the time to get a nifty photo of the final outcome. This will have to do:
As I said at the outset of this post, it was a pleasure to work with such great folks on their rod rack projects. But I'm done...having a much bigger fish to fry:
Cheers, Gary