

The list of materials:
Hook: My choices would be Daiichi 2441 or Gamakatsu T10-6H for regular ties, Daiichi's Bob Veverka 2139 for low water.
Thread: I like Gordon Griffiths 14/0 or Benecchi 12/0, in black
Tag and Rib: Lagartun's gold oval tinsel, size small for a #6 hook
Butt: Dubbed black beaver underfur
Body: Uni-Floss Bright Yellow
Underthroat: Hareline's UV Minnow Belly
Throat: Whiting's American Hen Cape dyed Claret
Underwing: Flashabou Grizzly Pearl and Black Accent
Wing: Dark green hair of choice
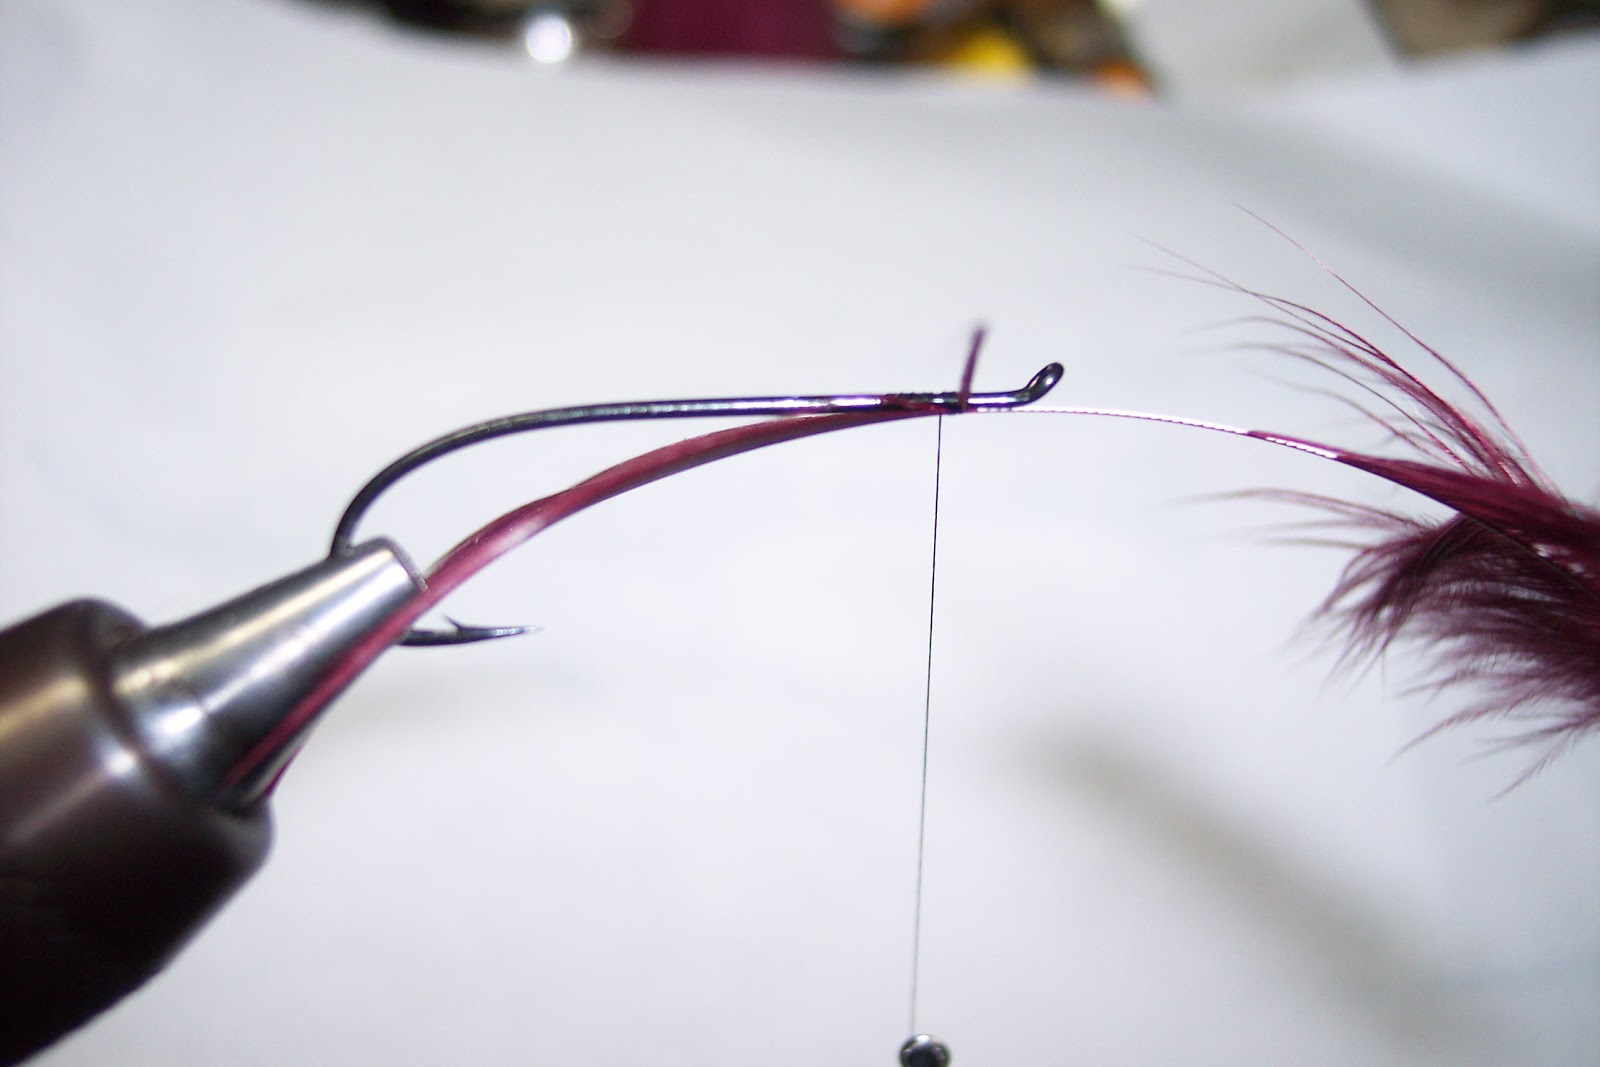
Get started by chucking your hook of choice (to paraphrase a comment oft heard on Speypages, "Your vise, your rules") and tying in your thread just above the hook point and running it back such that it will underlie 7 turns of the small gold oval tinsel:

Tie in the tinsel. I like to hold it under the hook, wrapping to the foward extent of the thread:

And wrap the tinsel 7 turns forward and tie down:

Take a tiny bit of the black beaver dubbing, wax the thread, and spin it on the thread:

Wrap the dubbing to get a nice tight little butt (did that come out wrong??)

Run the thread forward short of the head, tie off and cut off:

I use the floss on a bobbin for bodies like the Beauty's. I start it the same way you do when you tie in thread, but I don't cut the tag end off until I have run the floss back to the butt. I like a smoother body, so I am constantly twirling the bobbin counter clockwise as I'm wrapping it to take the twist out of it, making it lie flatter. Some good friends like a "ribbier" look to the body (hello Jack Skelley) so they don't do the untwisty thingy. "Your hook, your rules."

Cut the tag end off at the butt:

Begin wrapping forward:

Wrap forward leaving room for a good head and tie off:


Wrap the rib, going for the traditional but completely reasonless 5 turns (I know somebody is going to come up with a reason now):

It's all about a balanced appearance to the angler's eye. Why didn't I think of that? Miramichi friend Rob Feeney recently explained it similarly. When oh when will I ever listen??
Now tie in the UV Minnow Belly (I have a sneaking suspicion that this is one of the keys to the Beauty's success. As soon as I learn how to converse with atlantic salmon, I'll let you know if it really is or not.)

Here's a little how-to within a how-to on how I make throats when called for on a fly. I think it's described also in one of Dick Talleur's books, but I don't think he came up with it. Maybe somebody like Charlie DeFeo or somebody. Dunno. (edit: I do know now. Fellow forum-goer Eric Pepper was taught this method BY Charlie DeFeo at a Theodore Gordon Fly Fishers fly tying event. Thanks for clarifying for us, Eric.) Anyway, saves all that wrapping and pulling down stuff you have to get into if you wrap the throat versus this method:
Take a couple hen neck feathers (or whatever type of chicken you like to make your throats with...and this method also works with pheasant rump, etc), pull off the fuzz, and snip the stems so that you have a V-shaped pair:

Hold them under the hook so that the natural curve faces down and make a couple loose thread wraps around them:

Pull the stems forward 'til you have the throat length you think will drive salmon crazy:


Tie off, cut off the stems, and you have yourself a throat. None of the tugging and pulling and yanking trying to get a wrapped hackle to behave!

So now we have a throat:

We're nearing the finish line. Tie in the very hard to find Flashabou Grizzly Accent Pearl and Black flash. Why they call it Pearl and Black is beyond me. It is Green and Black. Only two places I know you can get it. Jann's netcraft and a place in Canada that I can't remember. Trust me, I own every single flash brand/color that even approaches this stuff from back when I was trying to buy more of the unlabeled stuff I first started tying the Beauty with. I have it on good authority that this is the only brand of flash to use if you want the Beauty to perform optimally.

Tie in your wing material du jour:

Trim and put a good dab of head cement on the butt ends before wrapping the head:

Wrap and varnish (I use 3-4 coats of Clear Cellire, which is now up to about 5 bucks/dinky little bottle!) and you are done.

The Celtic Beauty has some endearing qualities: it doesn't take long to tie, it is very durable, and kind of importantly, it makes atlantic salmon want to bite it. Give it a try this summer...you'll be glad you did!

nice one Gary!
ReplyDeleteGary, nice job on explanation, and nice fly, similar to the Danny Bird variation on the Green Widow in Paul Marriner's new book. I use PEACOCK-BLACK. Krinkle Mirror Flash for the flash material and I can't keep the fish off it.
ReplyDeleteBryant
Thanks, Harold! Bryant, I'll have to look for that variation on the Green Widow (only have Paul's older book), since the "regular" Green Widow appears to have no resemblance to the Celtic Beauty. Will be fun to search it out. Thanks for the tip!
ReplyDeleteI think it is a must try for Steelhead as well.
ReplyDelete